 Xur
Installation + first sign-in
Set up Xur from your phone.
Install Xur on your GPU host, then use your phone’s browser to create an account and load your first profile.
The USB installer runs on the host’s screen with a keyboard. After reboot, your phone becomes the web-manager client. The screenshots below show the real Xur interface at a phone-sized viewport, with example data.
1. Gather what you need
- A UEFI-capable x86-64 host with a target disk of at least 64 GiB. Allow extra storage for models, games and container images; check the release notes for tested hardware.
- A screen and keyboard connected to the host, Internet access for installation, and a USB drive of at least 16 GB.
- A computer to write the installer USB. The download page includes Windows instructions using Rufus and links for other operating systems.
- A phone with a browser and a Wi-Fi connection to the same local network as the host. The host can use Ethernet or Wi-Fi.
Back up first. Writing the installer erases the USB drive. Installing Xur erases the host disk you select. Xur is in early development; keep recovery media available.
2. Install on the host
- Download the online installer ISO and write it to USB. In Rufus, use GPT, UEFI (non CSM), FAT32 and ISO Image mode when prompted.
- Boot the host from the USB’s UEFI entry. Open Setup and installation, save a server name, then configure Ethernet or Wi-Fi. Use the host’s keyboard to move through the console with Up/Down and Enter.
- Choose Continue to disk selection. Check the disk’s identity and erase plan, then choose Yes to install. No is selected by default.
- Wait for installation to finish, confirm reboot and remove the USB. Saved networking, including Wi-Fi, carries over to the installed system.
Leave the installed console visible: it shows the HTTPS web-manager address and initial access code. For static networking or a USB answer file, see Network settings and answer YAML.
3. Open Xur on your phone
- Connect your phone to the same local network as the host. Avoid a guest Wi-Fi network that blocks access to other devices.
- Open your phone’s browser and enter the exact HTTPS address displayed on the console, including
:8443. For example,https://192.0.2.10:8443shows the format; use your host’s address. - LAN access uses a self-signed certificate. Check that the address matches your console, then use the browser’s certificate-warning option to continue to this host. The warning’s wording depends on your browser.
- Enter the console’s Access code and tap Sign in.
The initial code remains usable until the administrator account is created. It is a setup credential; keep it private.
If the page will not open, check that the host has rebooted into the installed system, that both devices are on the same network, and that you included https:// and port 8443. A self-signed-certificate warning is expected on the LAN.
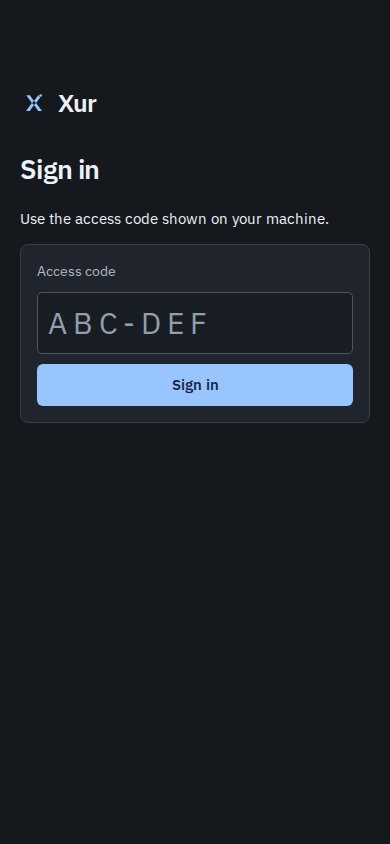
4. Create your administrator account
- On Create your account, enter a username or email and a password of at least eight characters.
- Use your phone’s password manager to suggest and save a strong password. Suggestions depend on your browser’s settings and trust in the site.
- Tap Create account. Use this username and password for future sign-ins.
Account creation disables the initial access code and setup-only sessions. Keep the saved password available before closing the browser. If setup fails, the page offers Download setup logs.
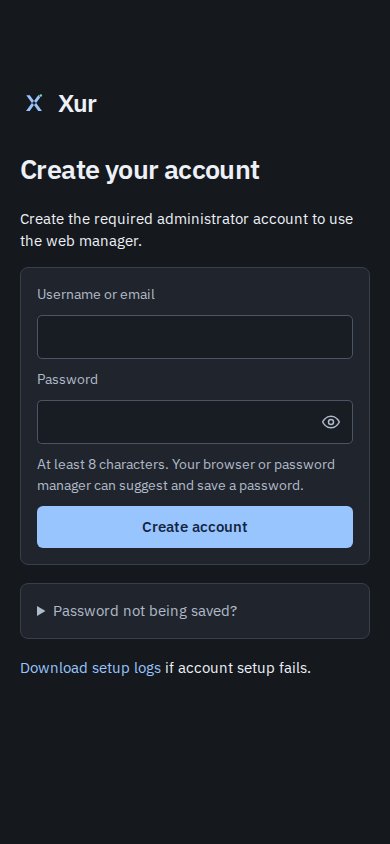
5. Make your first profile
- Open Profiles and tap Create profile. You can also create a profile from Home when none exist yet.
- Tap Rename to give it a descriptive name, such as Gaming desk, then tap Done. Start with a single workload so you can check its setup before adding more.
- Choose Workstation under Workload type. Under Workstation, choose New workstation or reuse an existing one. For a new workstation, enter its name and choose an existing User or tap Add user. A named user keeps its home and game logins across profiles.
- Select the GPU for the workload. Each GPU belongs to one workload at a time. For multiple workstations, use distinct GPUs and users.
- Review the controller and USB options below the GPU selection, then tap Save profile.
The example shows one workstation and one GPU. For model workloads, follow Models and APIs; for desktop streaming and peripherals, use the workstation guide.
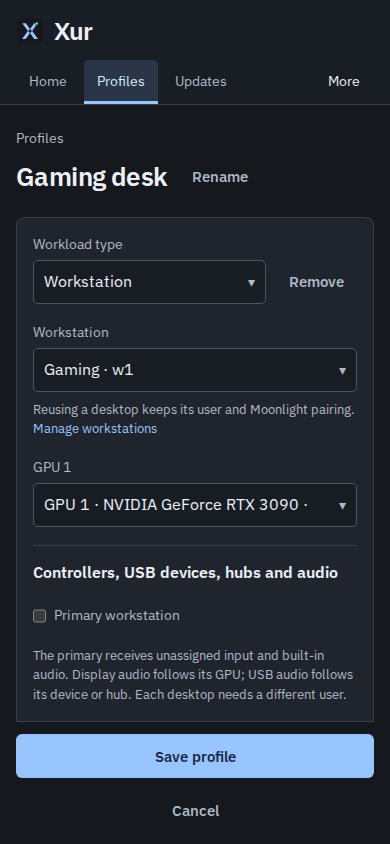
6. Load the profile and check it
- Return to Home, select your saved profile and tap Load profile. Saving a profile alone does not start it.
- Allow time for the first start, especially when model files or container images need downloading. Open Profiles to follow the change and review any errors.
- Tap More, then Monitoring to check resource use and running workloads. For a desktop, use More → Workstations to manage its identity and Moonlight pairing.
Your phone manages the host through the web interface. To stream a workstation desktop, follow Workstations and Moonlight.
For access away from home, open More → Tailscale, authorize the installed host and use its HTTPS Serve address from a client connected to your tailnet. Keep the LAN URL for local access.
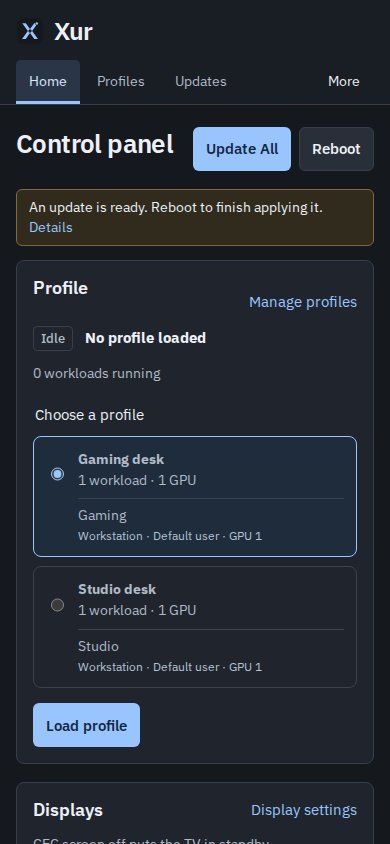
Continue with Getting started for everyday navigation, files and profile switching, or Updates and recovery to keep the host current.